Sign up for Lesson Plans, discounts & more!
The Fossil Hunt:
A Fossil Lesson Plan
Part 2: The Fossil HuntThis is a continuation of a lesson plan on fossilization. For part 1 click here or on the link at the bottom of the page that reads: The Fossil Hunt is part 2. Part 1, Fossilization, is here.
Notes for the leader/teacher: We recommend that you say as little as possible in each lesson, giving your students opportunities to think and express their own ideas. Dialogue is included in bold and italics. Things you would do during the lesson are in CAPITAL LETTERS.
When the plaster has set up (30-60 minutes) you may begin the excavation process, but you might want to leave it for a few days or weeks. Then, when students return to it, they won’t have a memory of which fossil is in which particular location. That will help make the process of the fossil hunt even more realistic.
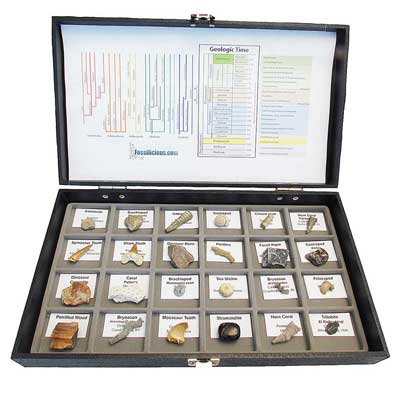
After the students have successfully completed their cleaning and identification, set up a “museum” to show off their work. As fossils are taken home, helping the students to set up their personal fossil collections is particularly important. Collecting boxes are easy to come by and not expensive. Student labels can be fixed to the box and the fossil cradled on felt or cotton batting for protection from sliding or bumping on the sides of the box. This last “collector’s” step is important closure for the process, but is also the best inspiration for a lifetime of collecting.
Materials for the Fossil Hunt:
- Prepared plaster of paris “rock” containing fossil specimens
- “Chisels”: a metal butter knife or small screw driver set (ranging in size from a tiny eyeglasses screwdriver to about an eight of an inch)
- Magnifiers of various types. These should be mounted so the hands can stay free and working while looking through the magnifiers at the fossil being removed
- Small bottle of vinegar with an eyedropper
- Clear nail polish
Before the lesson, remove the solid plaster of paris from the aluminum tray. Have enough tools set up so a group of four students can share a complete set. You might begin your lesson as follows:
- The rock in front of you is ready for the painstaking process of removing fossils from it. The paleontologist who sent these to us needs your help to carefully expose or remove the fossil. Since the fossil could be fragile and easily damaged, we need to do this with a great deal of care. The slightest chip in the work place could ruin the fossil we are trying to expose.
- When paleontologists are working at a dig site, they might see just a small part of a fossil sticking out of the rock formation or even just an impression above the ground that would lead them to suspect a fossil was contained in the rock at that location. The first step of the fossil hunt is to decide where the fossil might be hiding. Look at your rock to see if there are any bumps or ridges that might indicate a fossil burial. ALLOW STUDENTS TIME TO DECIDE WHERE THE FOSSIL COULD BE HIDDEN BENEATH THE SURFACE. HELP THEM TO USE A PENCIL TO OUTLINE THE AREA. BUMPS OR IRREGULARITIES IN THE SURFACE ARE TYPICAL CLUES.
- Once you decide where you want to start your dig and have marked it with a pencil, use a metal butter knife or scraper to gently scrape off the top layer of rock just outside the pencil lines. As you work, you may begin to see the edges of the fossil. Carefully scrape around the edges until you think you have a good outline of the fossil. IT WILL TAKE SOME TIME FOR THE FOSSIL TO REVEAL ITSELF. IT IS IMPORTANT FOR STUDENTS TO REMOVE THE MATRIX A LITTLE AT A TIME USING A SCRAPING TECHNIQUE. IN THIS EXERCISE, YOU WON’T NEED TO USE ANY CHIPPING WITH HAMMERS. THE FOSSIL MAY STAY EMBEDDED IN THE ROCK MATRIX, USING THE MATRIX AS A SORT OF READY MADE STAND. IN THIS CASE, THE STUDENT WOULD CLEAN A NEAT “TROUGH” AROUND THE EDGES OF THE FOSSIL, AND THEN CLEAN THE SURFACE OF THE FOSSIL. ALTERNATIVELY, THE STUDENT CAN WORK AT REMOVING THE FOSSIL ENTIRELY. THIS MAY TAKE A BIT LONGER, BUT IT WILL ALSO GIVE THE OPPORTUNITY TO TRY SOME ADDITIONAL TECHNIQUES FOR REMOVAL. SEE #5 BELOW.
- Next use a brush to gently remove the “rock” that is covering the fossil. If some of the rock is thick you can carefully scrape at it with a chisel. Be extra careful, though, because you could chisel off a part of the fossil. STUDENTS WILL CONTINUE WORKING TO REMOVE THE ROCK AROUND THE FOSSIL. THE FOLLOWING ARE SOME SUGGESTIONS THAT IMITATE THE WORK OF THE PALEONTOLOGIST IN THE LAB.
- If the fossil is tightly embedded and scraping away the matrix seems too great a challenge, you can use a mild acid solution to help dissolve the matrix away. In the lab, paleontologists, protect the exposed parts of the fossil from the acid by painting it with a special glue. STUDENTS CAN IMITATE THIS PROCESS BY USING VINEGAR DROPS ON THE MATRIX AROUND THE FOSSIL. SINCE VINEGAR IS SO MILD, THEY CAN EVEN USE IT RIGHT ON THE FOSSIL TO REMOVE EXCESS MATRIX. ONCE MOST OF THE FOSSIL IS CLEANED, YOU CAN HAVE THE STUDENT COAT THE FOSSIL WITH CLEAR NAIL POLISH TO IMITATE THE PROTECTIVE GLUE COATING.
- The last step to completing your fossil hunt is to note the type of fossil, date of acquisition or discovery, and the location. Once your fossil is cleaned and ready for display, make a small information card that shares the name of the fossil, the geologic time period and the location where it was found.
The Fossil Hunt is part 2. Part 1, Fossilization, is here.
Check out some of the Educational Materials for sale on our sister site fossilicious.com.

interested in more? If so, you may want to check out our other sites:
fossilicious.com - Our online fossil and mineral rock shop.
rocksandminerals4u.com - An educational site about rocks, minerals, and geology.
 |
 |
 |
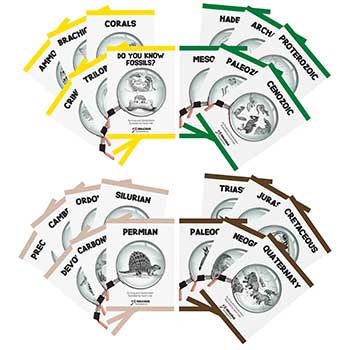
Geologic Time Geologic Time Line
Cenozoic Era
Quaternary
Neogene
Paleogene
Mesozoic Era
Cretaceous
Jurassic
Triassic
Paleozoic Era
Permian
Carboniferous
Devonian
Silurian
Ordovician
Cambrian
Archean Time
Hadean Time
Teachers Resources
Activities for Education and Fun
Earth Science Lesson Plans
Activities For Kids
Fossil Lesson Plans
Fossil Activities
Education Articles
Coloring Pages
Dinosaur Coloring Pages
Montessori Materials
Geology Club
Fossil Hunting
 |
 |
 |