Sign up for Lesson Plans, discounts & more!
Fossil Lesson Plan Intro:
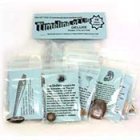
Using The “Magic Bag”
This fossil lesson plan is used as an introduction to fossils. It is
both fun and interesting for children of all ages, with some adaptation.
There are 2 variations on this page, The first is for older students,
middle and high school students. The second is designed for elementary
students. Scroll down for fossil lesson plan for elementary students.
Fossil Lesson Intro:
Using the “magic bag” with older students
Note: I did this lesson with middle school students who were mesmerized throughout the introduction. We passed the closed bags around to give the opportunity to compare the sensory impressions. The students began to make predictions about the fossils contained in the bags. We kept passing until the students thought they were back to their original bag—this, too, inspired discussion and critical thinking.
Number of Students For This Fossil Lesson Plan:
• Best for up to 15 just for management issues; however, could do with twice that number, and have two students share one bag. With younger children, work with smaller numbers in the group.
Materials:
- A few different fossils (one for each student or pair of students)
- Small “jewelry bags” to contain one fossil each
- Reference books for identification of the fossils
Fossil Lesson Plan Process:
- Have students sit in a circle on the floor—better yet, a carpeted floor, just in case the fossil falls.
- Before you hand them a “magic bag,” Talk
about “What is old?” Have the children travel back in time to define
old things. The distance in time will vary greatly depending on the age
of the students. (I’ve done this successfully with 12-15 year olds. It
was especially effective when my schedule had allowed for previous
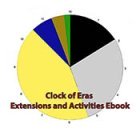
experience with the Clock of Eras.)
Ask them how they would have to handle something that was 300 million years old? Emphasis is on the fragility of the fossils.
Let them know that when you hand them a bag, they are only to carefully explore with their fingers through the fabric bag. NO PEEKING YET! - Hand out a bag to each child.
Ask the students to carefully feel the fossil inside without looking at it.
Have them describe how it feels. They could predict the type of fossil it might be.
You could include a discussion of the body parts of the animal fossil they could be holding.
Depending on the age and experience of the students, you could also discuss classifications: shells often indicate mollusks, but could also be an echinoderm or arthropod.
Discuss how a fossil is formed: cast, mold, actual animal body, etc. Ask the student to make a guess from feeling through the bag as to the type of fossil the bag might contain.
- Invite the students to carefully remove their fossil from the bag.
Have them reflect on whether the fossil looked as they expected.
Have the students make visual observations as they did with the tactile observations: body parts visible, possible classification, etc. - Identify
the fossils using reference books. Have students fill out the
identification card and set up a small museum for others to enjoy. If
you are doing this activity with only a few children, work on making a
collection or display for the home.
A Fossil Lesson Plan For:
Elementary students: The Magic BagPut one sturdy fossil in a single large bag so the children don’t see it. Fossils that are good for this are those that have deep ridges or clear shapes, like a brachiopod, an unpolished orthoceras or a trilobite.
Pass the bag around and have the children feel the fossil through the bag.
As children imagine the contents, have them create questions, like a “20 Questions” game, with only yes or no answers. You can give the answers, but don’t be too easy or general. The more your “yes” answers are saved for really accurate details, the better questions you’ll get.
Examples:
Is this an animal?
Does it live in the ocean?
Can you see it at a zoo?
Can you see it in a museum?
After the questions are answered, the students can begin to make guesses about the contents.
Once the animal is exposed, identify it using research books (or you could reveal the name yourself) and write its name on a card or label. Display the fossil and its name card on a shelf along with prepared question cards to encourage research.
You might also purchase or prepare booklets that contain the answers to the questions on the cards within the reading. Placing the booklets on the shelf next to the fossil and the questions will encourage reading and research.
For further research writing, your question cards could be printed individually with spaces for writing the answers. This would be a wonderful preparation for note taking and research paper writing. (Your students’ later teachers would bless you!)
If you want to extend this fossil lesson plan into writing a research paper as individual students or as a class, follow these steps:
Help your students to sort the information cards into logical groups.
Lead the discussion to create a topic sentence for each group of information cards.
Organize the cards into a logical order.
As needed, write good quality sentences that share the information contained on the cards.
When you have finished, you will have created a logical, well-organized research paper.
For comments on the fossil lesson plan click here
Check out some of the Educational Materials for sale on our sister site fossilicious.com.

interested in more? If so, you may want to check out our other sites:
fossilicious.com - Our online fossil and mineral rock shop.
rocksandminerals4u.com - An educational site about rocks, minerals, and geology.
Geologic Time Geologic Time Line
Cenozoic Era
Quaternary
Neogene
Paleogene
Mesozoic Era
Cretaceous
Jurassic
Triassic
Paleozoic Era
Permian
Carboniferous
Devonian
Silurian
Ordovician
Cambrian
Archean Time
Hadean Time
Teachers Resources
Activities for Education and Fun
Earth Science Lesson Plans
Activities For Kids
Fossil Lesson Plans
Fossil Activities
Education Articles
Coloring Pages
Dinosaur Coloring Pages
Montessori Materials
Geology Club
Fossil Hunting
 |
 |
 |
